

Late October is the time to carve jack-o-lanterns and decorate pumpkins for Halloween Eve! These orange and white vegetables add festive color to our doorsteps and welcome our young ghosts, witches and Disney characters seeking candy.
The Celts began this All Hallows Eve festival of “Samhain” 2000 years ago by lighting bonfires to ward off ghosts. Now we place candles inside carved pumpkins to light toothy smiles and ghoulish faces.
Let your imagination and our tips guide your creativity. We can help you make Halloween cheer or fright – you pick the outcome – and keep your project as simple or as intricate as you desire.
Without further “aboo” let’s get started.
Painting Your Masterpiece
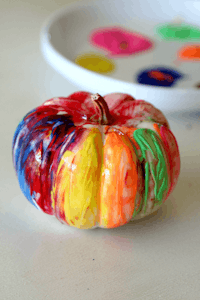
When working with toddlers, painting pumpkins is a great option. Only a few items are needed for your little one to have a field day! Small pumpkins (white is best as the background), finger paints and a plate for squirts of colors are the required supplies…oh, and, your little one’s fingers for creating personal masterpieces.
For a more artistic flair, creating a marbled effect is easy. With indigo blue nail polish (or another color that suits your fancy), a stirring stick, plastic container, wax paper and small pumpkins, you can make a cheerful splash for your porch.
Carving Your Way to a Frightful Night
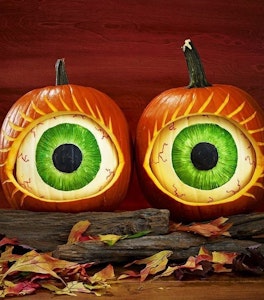
Want a pair of eyes on your front porch to keep watch? Look no further! These “Eye See You” pumpkins will cause a stir! This project requires two white pumpkins for the eyeballs and two slightly larger orange pumpkins. Gather these tools to create this jaw dropper: a carving knife and spoon for hollowing, linoleum cutter, pen or pencil, diluted green and black acrylic paints, and permanent red marker.
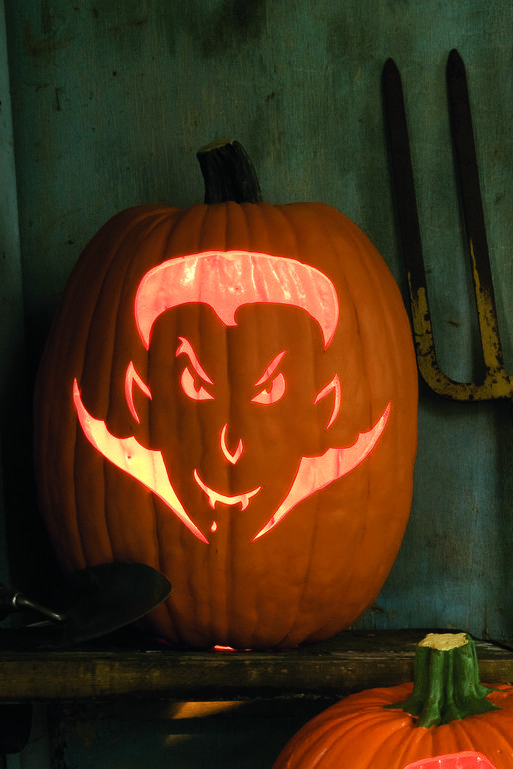
There is always the traditional, beloved jack-o-lantern to fall back on, an easy-to-create option for which you need a pencil or pen, carving and scooping tools, a candle — either wax or battery operated, and possibly a lighter. For elaborate designs, stencils found online and at retail stores can make this task simpler. Take a look at this “Teen Scream” design numbered in the order you cut out each area of the pumpkin.
Embellishments Spell Style
If you want to avoid the pumpkin guts “ick” factor, and to decorate with something less messy than paint, think about fabric scraps, bead or gems, lace and ribbons. Consider this way of embellishment as thinking outside the pumpkin. Use sturdy glue or a hot glue gun and notions to dress your pumpkin and bring flair to your doorstep.
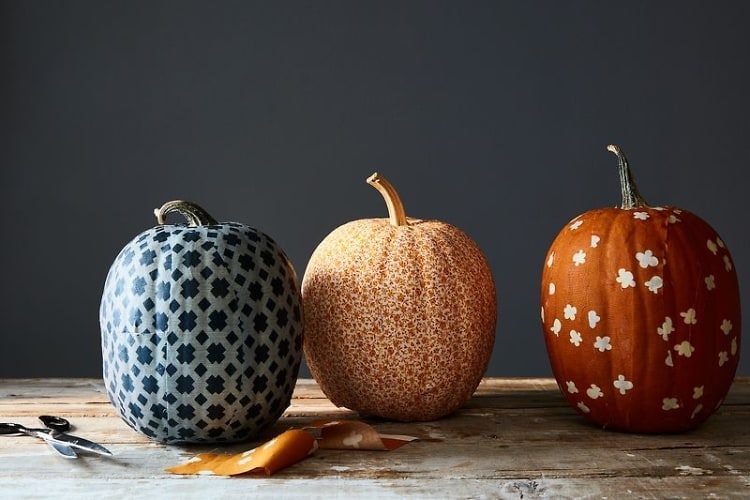
Show off your chic style! To fully cover your pumpkin in fabric, you will need a wide, coarsely bristled paint brush, Mod Podge, sharp fabric scissors, and a half-yard of fabric.
Whether you prefer to carve or cover, outfit your porch with eye-catching pumpkins to welcome Halloween visitors to your door. Happy Halloween!
